Cabinet handles and knobs may seem like small details, but they play a major role in the overall look and functionality of your kitchen or bathroom. Properly installing hardware not only enhances the appearance of your cabinets but also ensures smooth and comfortable use. A well-executed hardware installation can elevate the space, giving your cabinets a polished, professional finish.
Here are essential installation tips for cabinet handles and knobs to achieve a polished and cohesive look.
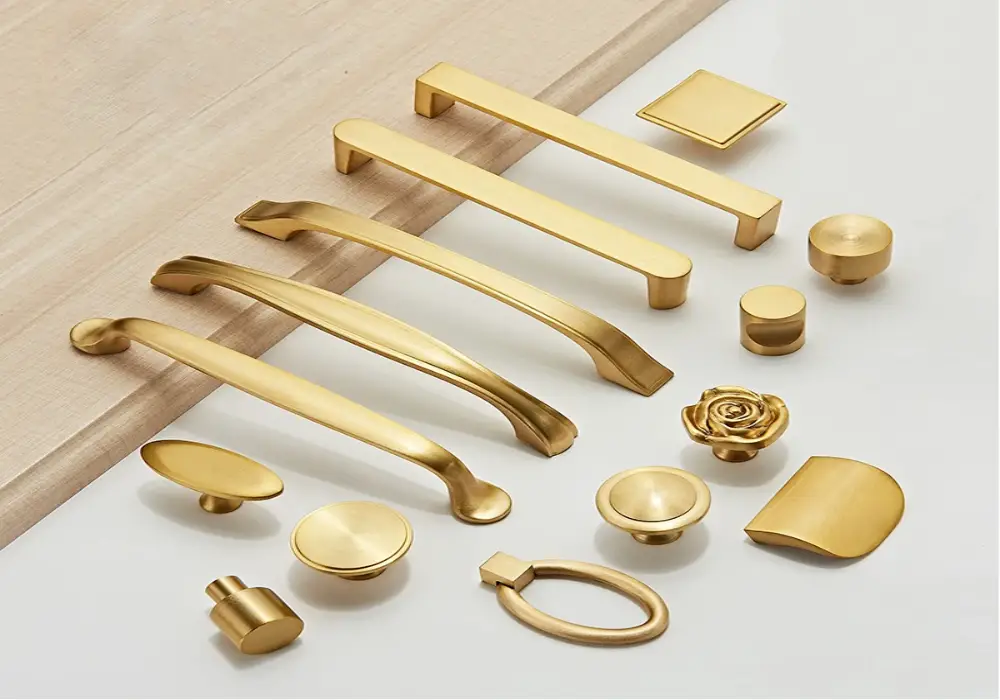
1. Choose the Right Hardware for Your Space
Before starting the installation process, it’s important to select hardware that complements the design and style of your cabinets. The right cabinet handles and knobs can make a significant difference in the overall aesthetic of your space.
Tips for Choosing Hardware:

- Consider the Cabinet Style: For modern or minimalist cabinets, choose sleek, simple hardware like bar handles or flat knobs. Traditional or farmhouse cabinets look great with more ornate or vintage-inspired designs.
- Match the Finish: Choose a hardware finish that complements other finishes in the room, such as faucets, light fixtures, or appliances. Popular finishes include brushed nickel, matte black, brass, and chrome.
- Size Matters: The size of your hardware should be proportional to your cabinets and drawers. Larger drawers may require longer handles, while smaller doors or drawers look better with smaller knobs or handles.
Pro Tip: Test different hardware styles and finishes against your cabinets to see how they look before making a final decision. Many hardware stores offer sample pieces for testing.
2. Determine Handle and Knob Placement
Proper placement of cabinet handles and knobs is crucial for both aesthetics and functionality. A consistent placement creates a cohesive look and ensures ease of use when opening doors and drawers.
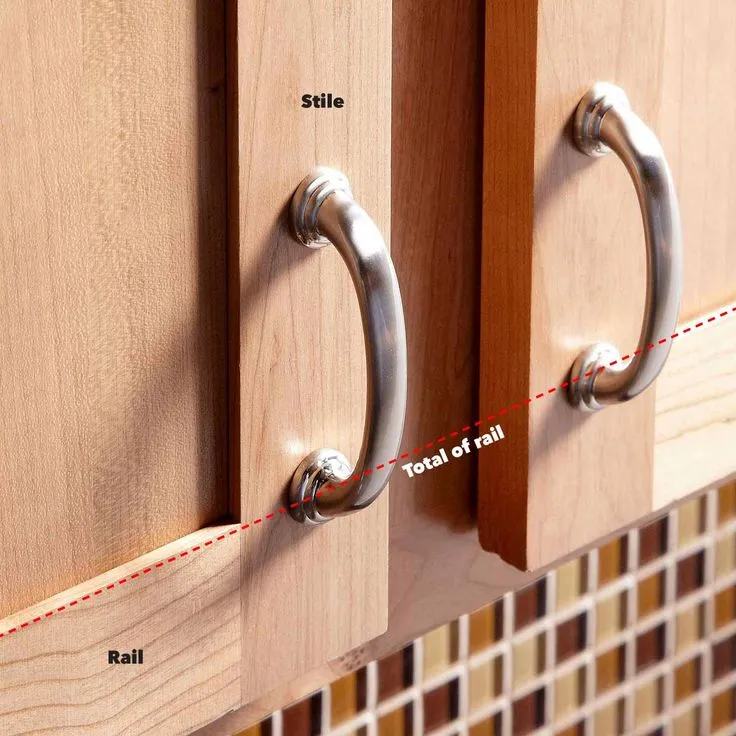
Guidelines for Placement:
- Knobs on Doors: For cabinet doors, knobs are typically placed 2.5 to 3 inches from the corner of the door, either vertically or horizontally depending on the style. On upper cabinets, place knobs in the lower corner; for lower cabinets, place them in the upper corner.
- Handles on Doors: Handles (pulls) are generally installed vertically on cabinet doors, 2 to 3 inches from the edge of the door. Ensure they are centered vertically for a balanced appearance.
- Handles or Knobs on Drawers: For drawers, handles are usually installed horizontally and centered on the drawer front. For large drawers, you can install two handles, spaced evenly on each side of the center.
- Knobs on Drawers: Knobs on drawers should be placed in the center, about one-third down from the top.
Pro Tip: Before drilling, tape the handles or knobs in place to test how they look and feel. This can help you visualize the final placement and make adjustments if needed.
To inquire about the price of installing the cabinet and its handle, contact our experts.
3. Use a Template or Hardware Jig for Consistent Placement
Consistency is key when installing cabinet hardware. Using a template or hardware jig ensures that each handle or knob is placed in exactly the same position on every door and drawer, preventing crooked or uneven installation.
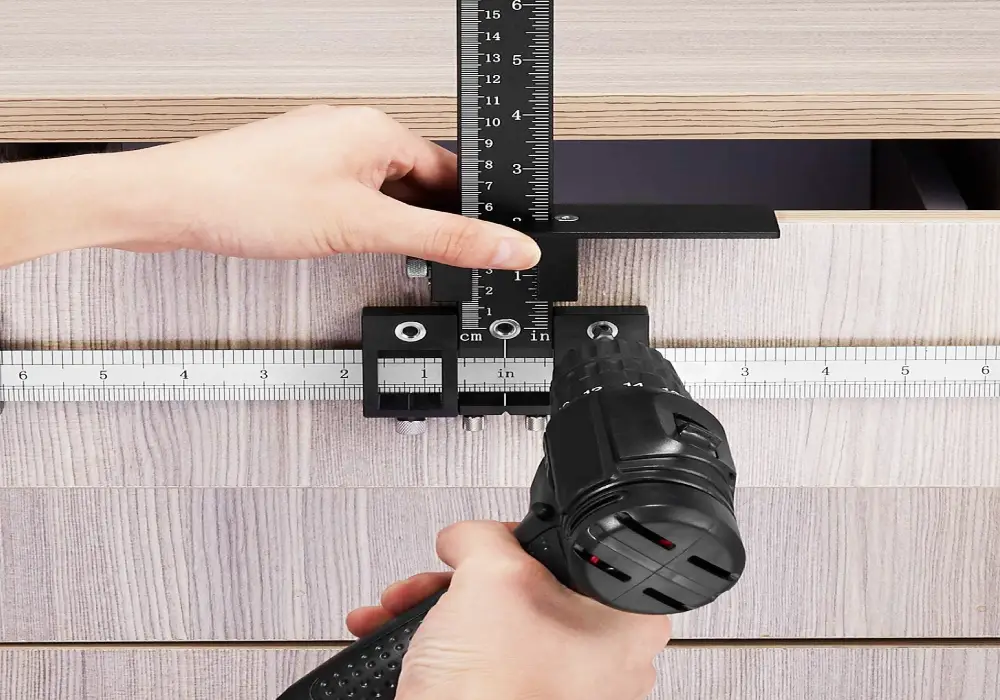
Steps to Use a Template or Jig:
- Purchase or Create a Template: You can purchase a pre-made hardware template at most hardware stores, or you can make your own by drilling holes in a scrap piece of wood or cardboard to match the hardware spacing.
- Align the Template: Place the template against the door or drawer where you want to install the hardware. Align it carefully, ensuring that it is level and positioned correctly.
- Mark the Drill Holes: Using a pencil or marker, mark the drill holes through the template onto the cabinet.
- Drill the Holes: Drill the holes where you made the marks, ensuring that you drill straight and cleanly through the cabinet surface.
Pro Tip: A hardware jig is a reusable tool that allows you to easily replicate the exact placement of each handle or knob across all your cabinets, ensuring consistent spacing and alignment.
4. Drill Pilot Holes Carefully
Drilling the correct size pilot holes is critical for ensuring that the hardware is properly secured to the cabinet and won’t loosen over time. Pilot holes also prevent the wood or cabinet material from splitting.

Steps for Drilling Pilot Holes:
- Choose the Right Drill Bit Size: Use a drill bit slightly smaller than the screw that comes with the hardware. This ensures a snug fit for the screws.
- Drill from the Front to the Back: Always drill from the front of the cabinet door or drawer to the back. This prevents any splintering or damage to the front surface.
- Use a Level and Steady Hand: Ensure your drill is perpendicular to the cabinet face to avoid crooked holes. Drill slowly to maintain control and accuracy.
Pro Tip: If you’re worried about damaging the cabinet surface, use a piece of painter’s tape over the area where you plan to drill. This can help prevent chipping around the hole.
5. Install the Hardware
Once you’ve drilled the pilot holes, you’re ready to install the hardware. Properly securing the handles or knobs ensures that they are sturdy and aligned for long-term use.
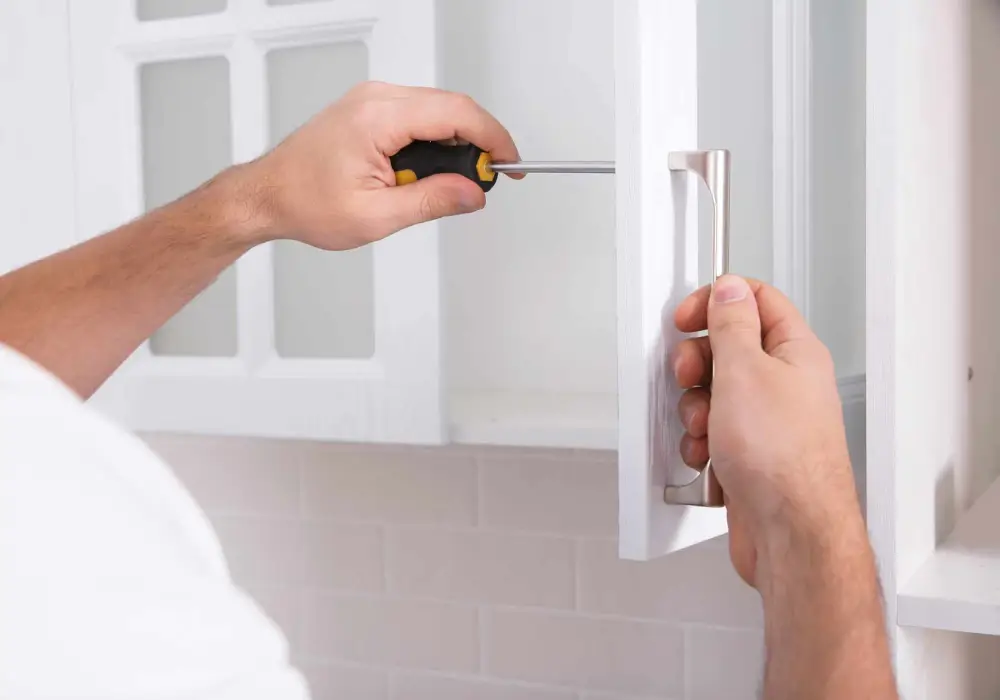
Steps for Installing Hardware:
- Insert the Screws: Insert the screws into the pilot holes from the inside of the cabinet or drawer. Align the handle or knob with the screw holes on the front of the cabinet.
- Tighten the Hardware: Use a screwdriver (preferably manual) to gently tighten the screws. Avoid overtightening, as this can strip the screws or damage the cabinet material.
- Check for Alignment: Once the hardware is secured, check to ensure that it’s straight and level. Adjust as needed before fully tightening the screws.
Pro Tip: Avoid using a power drill for tightening the hardware, as it can easily overtighten and strip the screws. A manual screwdriver offers better control.
6. Test for Functionality and Alignment

After the hardware is installed, test each handle and knob to ensure they function properly and feel comfortable to use.
Testing the Hardware:
- Open and Close Doors and Drawers: Check that each handle or knob allows the cabinet doors and drawers to open and close smoothly. Make sure the hardware is firmly attached and doesn’t wobble.
- Check for Comfort: Ensure that the handles or knobs feel comfortable to use, especially on frequently used cabinets.
- Double-Check Alignment: Step back and view the cabinets from different angles to ensure all the hardware is aligned and evenly spaced.
Pro Tip: If you find that any hardware is slightly misaligned, adjust it before the screws are fully tightened to avoid unnecessary wear on the cabinet surface.
7. Finishing Touches for a Polished Look
The final step is to make sure your cabinets and hardware look polished and clean, ensuring that every detail is perfect.

Final Thoughts
Installing cabinet handles and knobs is a simple but impactful way to enhance the overall look of your kitchen or bathroom. By carefully selecting the right hardware, using a template for consistent placement, and ensuring that each piece is properly aligned and secured, you’ll achieve a polished, professional finish. Take your time during installation to ensure every detail is perfect, and your cabinets will look great for years to come.
Finishing Steps:
- Fill Any Extra Holes: If you’re replacing old hardware, fill any leftover holes with wood filler or putty that matches the cabinet color. Sand and repaint the area if necessary.
- Clean the Hardware: After installation, wipe down the handles or knobs with a microfiber cloth to remove any fingerprints or dust.
- Inspect for Flaws: Do a final inspection to ensure that there are no misaligned screws, chipped edges, or visible gaps around the hardware.
Pro Tip: Consider applying a protective coating (like wax or a clear sealer) to the hardware to help prevent tarnishing or scratches over time, especially for brass or bronze finishes.